Saturday, March 29, 2008

Vanilla Buttercream Frosting


I hope everyone had a beautiful Saturday. The weather here was gorgeous with bright sunny skies and temps in the 50's! Hubby and I got to enjoy a nice dinner out together. It's been soooo long since we've been able to do that.
Anyway, I have that frosting recipe that I promised earlier this morning. Rue, your comment cracked me up! I still giggle when I read it! So here it is:
1 cup(2 sticks) unsalted butter, softened but not melted
6-8 cups confectioners sugar
1/2 cup milk
2 teaspoons vanilla extract
Place the butter in a large mixing bowl. Add 4 cups of the sugar and then the milk and vanilla. Beat with an electric mixer on medium speed until smooth and creamy; about 3-5 minutes. Gradually add the remaining sugar, 1 cup at a time, beating well after each addition (about 2 minutes), until the icing is thick enough to be of good spreading consistency. You may not need to add all of the sugar. Use and store the icing at room temperature because icing will set if chilled. Icing can be stored in an airtight container for up to 3 days.
This recipe makes enough for one 2-layer cake or 2 dozen cupcakes.
I must give credit where credit is due...I got this recipe from Magnolia Bakery while doing a recipe search for Vanilla Buttercream Icing.
It's delicious!!!

Cupcake Decorating


Hello!
I had a lot of people email me and a few who left comments with some questions about how I did the cupcake decorating on this post here. Thank you so much for your interest and kind comments and emails!
So...I thought I'd do a post about how I did it. Most of the questions were about the colors used and which tips I used. I wanted pastel colors so I used gel food coloring that you can buy at the grocery store. I used Betty Crocker gel food colors and it comes in a box of 4 tubes. The colors included are red, yellow, blue and green. With this type of food coloring, you generally don't get the bright colors that are pictured on the box. They're usually always a softer version of the bright hues. The less you use, the softer, more pastel the shade is. This is exactly what I wanted so I just used a small squirt of the gel to achieve the desired pastel color. I used each color as it was in the tube. You could definitely experiment and mix colors if you wanted to.
(Just a note, if you're looking for brighter, bolder colors for your icing, I have found the Wilton concentrated gels work well for that. You can find those at most craft stores in the cake decorating aisle and some Walmart stores carry them too in the craft section.)
Anyway, I have a really YUMMY vanilla buttercream frosting recipe that I use. Just stir in the food coloring and be sure to mix really well. You don't want any white streaks through your frosting. Okay, now for the fun part. As soon as I finished making the icing, I divided the plain white icing into four separate bowls and made up four different colors. Then, to decorate I just used plastic ziploc baggies for piping bags. They're much cheaper than cake decorating bags and you get the exact same results. Snip a tiny piece of the corner off of each bag with some scissors. Place your cake decorating tip inside the bag where you just cut the small opening. Now, you can fill your bag with the desired icing color and decorate to your hearts content! I used 3 Wilton tips - #12, #21 and #2. #12 is a wide circular opening, I used it for the smooth swirls. #21 is a star shaped point that I used for the more textured swirls and #2 is a tiny circular opening that I used for the polka dots. Everything that I used is pictured above for easy reference. I hope this helps and answers all of your questions! I was going to include the vanilla buttercream frosting recipe in this post too but I hear the baby waking so I will have to put it in another post. Hopefully I will get it posted today! Have a wonderful day and happy baking!!
xo, Erin

Thursday, March 27, 2008

Baby Shoes

My baby has outgrown all of the super cute little baby shoes that you can buy in the stores. I have a pair of Carters baby slippers that are shaped like the most adorable little puppy dogs - complete with little fuzzy ears but as I went to put them on him today I was so sad to see that he has outgrown them! So, I decided to make my own!
I made two pairs - one is a soft blue chenille and the other is a sweet little baseball theme. I love them!! They were such fun to make I just know I'll be making many more!

I found a cute little pattern here. They are very quick and easy to make and she has a wonderful tutorial as well as a printable pattern! They are for size 6-9 months but you can do what I did and just cut them slightly larger if you need them bigger.

Have fun and enjoy!!

xo, Erin


Tuesday, March 25, 2008

Projects!!


I know, second post in one day, I can hardly believe it myself!! I was so excited though about checking off a few more projects on my list as I finished them and I wanted to share them with you!! First, remember those chairs I posted about back in January? To paint or not to paint? Well, I decided to go ahead and paint them and boy am I glad that I did!! I like them soooo much better now! For those of you who didn't see the before photos back in January, here they are.


I also finished up a button frame that I've been meaning to do for awhile now. It was fun and very easy!
Here's how I did it:

First, go to the dollar store and buy yourself a cheap $1 frame like the one above. Then, get out all of your buttons and sort through and set aside the ones you want to use. I used all white ones.

The next thing you want to do is give your frame a coat of spray paint. I used white to match my buttons but you can use whatever color you want to coordinate with your buttons. Then, get out your glue gun, let it heat up and start gluing on your buttons. I think the whole project only took about a half hour!


I then mounted the picture on a page from an old book.
Great fun and here is the finished project!


Last but not least, I have this altered book/scrapbook. I found a children's board book at the dollar store - you gotta love that dollar store! I made a template for the page (you only need one template because all of the pages are exactly the same) and then I cut out pretty scrapbook paper for each page of the book. I then placed pictures inside and embellished it. So cute!


Have fun creating!!
xo, Erin

Cupcakes!!


So, are you wanting a cupcake now?? I love cupcakes! I love to make cupcakes! It was one of the things I had been craving so I made a whole mess of em' for my Easter dessert buffet! Now you can get an image induced sugar high at 10:15 in the morning! Anyway, I hope everyone had a very blessed Easter. I know we did. We had a houseful - 20 total, I think, maybe a few more! We had a great time and ate lots of great food. The kiddies all had a fabulous Easter egg hunt in the backyard - the weather was perfect for it!
and now I'll leave you with some little papier mache bunnies I made a couple of years ago

Have a lovely day!!

Wednesday, March 19, 2008

Some Pretties for Easter

I ran out yesterday to do my weekly grocery shopping and to pick up a few last minute things for the kids' classroom Easter parties. While out, I stopped in at Michaels craft store and the Dollar Store.


Boy, am I ever glad I did! I went in for scrapbook papers and would you just look at what I found?? I saw this pretty box at Michaels several weeks ago but I didn't want to pay what they were asking for it. It just so happens though, that it was marked down - YIPPEE!! So I decided to go ahead and get it. And then, as I turned the corner, I saw this beautiful clock and little wall hook and scrolly white frame! Oh my gosh, everything was marked down 40% and I had a Michael's gift card!! So, needless to say, I came home yesterday with wonderful treasures that will go perfectly in my new kitchen!!


Then, I wandered into the Dollar Store for some gift bags as well as a few goodies to fill them with for my kids' classroom Easter parties. While in there I found these adorable little marshmallow bunnies and chicks. I got a couple of bags for my candy/dessert buffet that I'm going to do for Easter. You see, hubby and I gave up all sweets/candy/desserts etc... for the Lenten Season. That means nothing sweet for me until Easter Sunday. I have been craving something sweet for so long!! I thought it would be fun to go all out on Easter Sunday with sweet little candies, cupcakes, and other pretty desserts on a buffet for everyone to enjoy.


Have a blessed day everyone!!

xo Erin

Sunday, March 16, 2008

My " New" Old Desk

I got another project done on my LONG list of projects - hee hee, you know how that goes!!
I had this old vanity that I found at a flea market and I decided to turn it into a desk. I really love those kitchens that have a built in desk incorporated into the cabinets and counters. So cute but we don't have one. So, I decided to make myself one. I took an old vanity that I had and repainted it white. I then antiqued it exactly like I did with the sofa table. I have this cute old ice cream parlor chair that I found at Goodwill so I'm using that for my desk chair. I think I might make a round cushion for the chair too - I'll add that to my project list - LOL!!
Have a happy Sunday everyone!!
xo Erin

Saturday, March 15, 2008

Lots to Catch Up On...


I'm back - I promise!
My husband's sweet grandmother passed away earlier in the week and so I've been away. She was a WONDERFUL person who lived a good life and will be greatly missed by many!!

On a happier note, today was a beautiful day, warm and sunny. We all worked out in the yard and gardens today cleaning them out and getting them all ready for spring planting. Even the kids helped out! Definitely a family affair! Anyway, while near my Rose of Sharon bush/tree, I removed some of the seed pods from the branches that had only partially opened last fall. I removed the seeds only to find out that they are shaped like a perfect little heart - who knew??!! So cute I just had to run inside and take a picture. I never knew they were heart shaped. I guess I need to pay more attention to these things!!
Then, I came in to take a break and do some baking!
My very good friend gave me the neatest gift about two weeks ago. She gave me a very unique gift of Amish Friendship Bread starter.
This is how it works:
The starter comes in a zip-loc baggie and for the first 5 days, you just squeeze and mush the bag each day to mix it up. On the sixth day, you add flour, sugar and milk and then mush the bag again. On days six through nine, you continue to mush the bag each day. On day 10, you add more flour, sugar and milk and then mush the bag again to mix it up. Then, you measure out four 1 cup servings of the mixture and place them into four new zip-loc baggies. You now have 4 new bags of starter. You keep one for yourself and then pass along the remaining 3 to your friends. You take what's leftover in the original baggie, mix it up with various ingredients and then pour the batter into two large bread pans. Then, you have 2 loaves of wonderfully, delicious Amish Friendship bread! The secret is in the starter. They say that only the Amish know the secret starter recipe. If you follow the directions and always keep one of the starters for yourself, you'll be baking this bread every 10 days! So today I made my first two loaves. What fun! I took this loaf pictured along with one of the starters and the directions to my neighbor down the street.

Okay...some more fun stuff!! Remember the Sweet Little Nest swap I mentioned a while back? Well, I'm finally able to post what my swap partner Heather sent me! Isn't this such a sweet nest? I love it so much and look at all of the goodies she sent along with it!

Here is a beautiful box in a lovely shade of pale blue that I simply adore! On the box are the sweetest cherubs (which I also love) it is soooo me - just what I love! And guess what was inside the box??
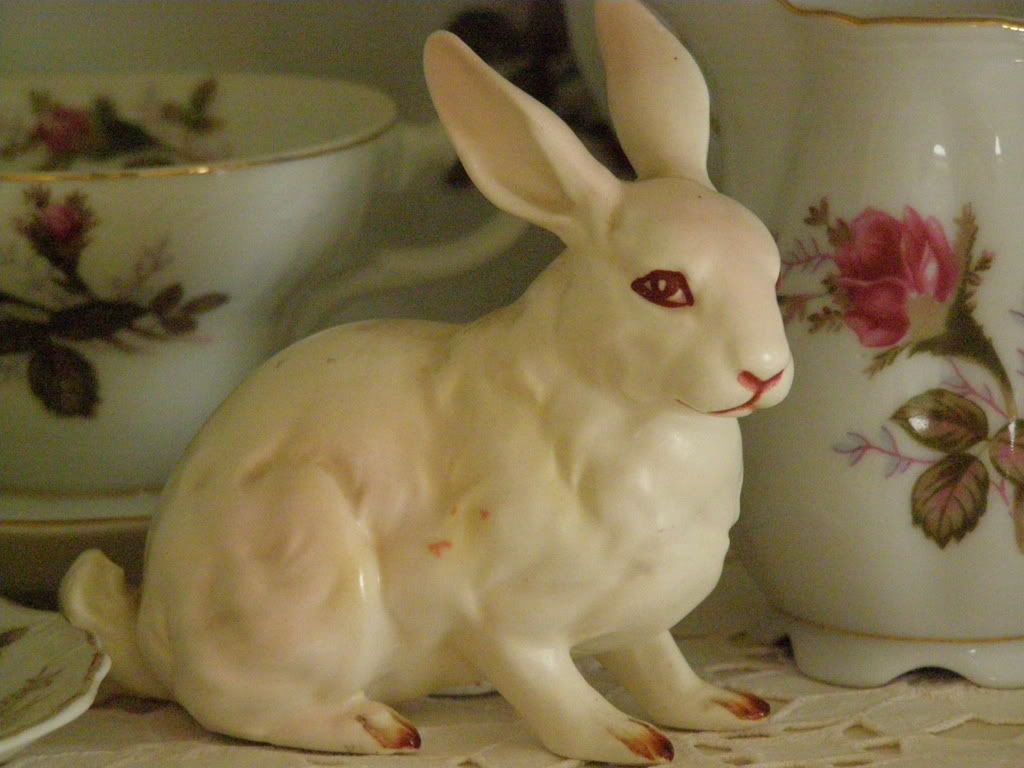
Yep...this oh so cute rabbit - which I also love!

And...check out this lovely tag with beautiful ribbon attached she made for me

This tag has my name on it all glittery and pretty
and this tag says "nest" also beautiful all done up in glitter!
Would you look at this gorgeous vintage postcard she sent me - LOVE IT!!
Thank you so much Heather!! She also sent me lovely book pages too! They're wonderful and I'm thinking of using some of them as a backing for some pictures I took of the baby. I switched the images to sepia tone and they would look beautiful mounted on those book pages! I'll have to post pictures when I'm done! Thanks again Heather, I had such a great time swapping with you! You should go and check out her beautiful blog!!

Then, I got another package from sweet Deborah at Pictures, Pots and Pens for participating in her Pay It Forward!! She sent me an adorable bucket filled to the brim with all sorts of wonderful goodies!! The beautiful bucket is a lovely gift in itself!
She beautifully wrapped each gift in pretty pink rose covered paper. It was so pretty I took a picture of the wrapping first. It was driving my son nuts! He kept saying please, please can we just open it?? Why do you have to take a picture - LOL!
Inside were these lovelies...


A notepad that says "Both of us can't look good at the same time. It's either me or the house." Too funny! Also enclosed was a super cute magnet that says "It's so exhausting being fabulous." Love it!! Also packaged inside were adorable Mary Engelbreit dimensional stickers, a wonderful dark chocolate candy bar with a vintage postcard image as the wrapper. I just know I'm going to use that wrapper in a great art project after I've eaten the candy. The wrapper is so pretty! There is also a wonderful rose scented candle and a nice BIG bar of soap (which I love) that smells really yummy!!

Thank you sooo much Deborah! You are very sweet and very kind to send such a wonderful gift! I really appreciate your kindness and generosity!

I have one other goodie that I received in the mail that I want to post but I'm suddenly having trouble uploading photos to blogger. So...I'm going to keep you in suspense until tomorrow when I can hopefully upload the photos.

Have a good night all!

xo Erin


Monday, March 10, 2008

I'm Back!!!


Oh my gosh, I'm back online and I feel like dancing! It's amazing how much we rely on our computers for everything! I never though I'd be that dependant on a machine - LOL! Thank you for your sweet comments and understanding!
Anyway, I have a few things yet to reload on my hard drive such as all of my photo software, etc...etc... and then I have lots of pictures to post and lots of catching up to do! It's getting late though and I have to get up VERY early tomorrow morning so I will sign off for now!
Goodnight all...sleep tight, see you tomorrow!

Friday, March 7, 2008

Hope to Be Back Online Soon

Good Morning Everyone!!

Just wanted to let you all know that I have been away due to a virus on my computer. I cannot get online and I am unable to access anything on my compter- emails, files, website, address book -nothing! I am currently at a friend's house using her computer to post this and I hope to get mine taken care of this weekend! By Monday morning, with any luck, I will be back up and running! Please bare with me -I know that there are a couple of you who I owe emails to and I am also trying to get my website orders out. I haven't forgotten anyone and I will get back to answering my emails very soon! I apologize but will be back!

Have a great weekend everyone! Hope to talk again Monday!